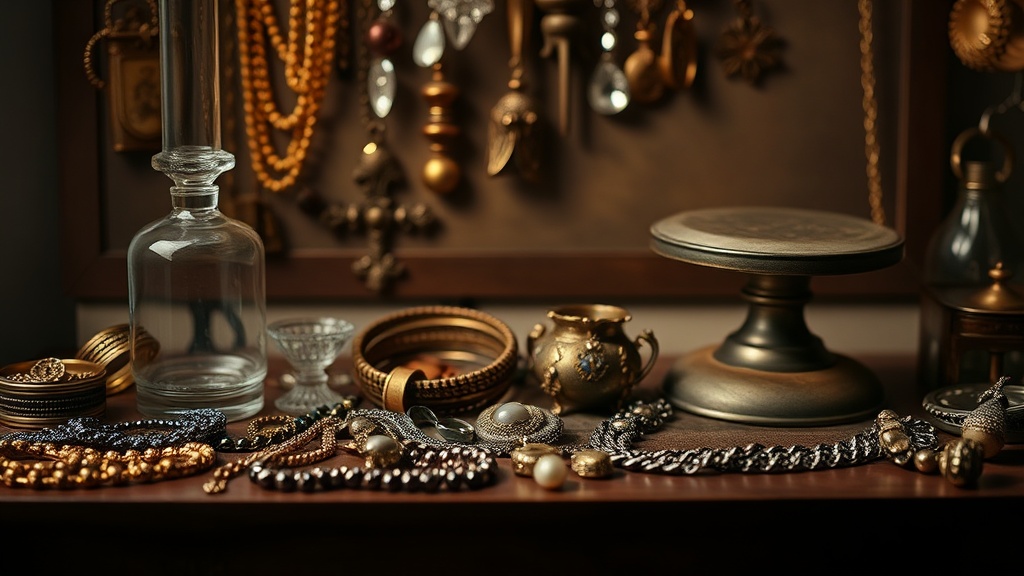
How to Safely Clean and Store Vintage Jewelry at Home

This post covers simple, safe methods for cleaning and storing vintage jewelry at home — from tarnished silver brooches to delicate pearl strands. Vintage pieces carry history (and often fragile settings), so the wrong technique can strip patina, loosen stones, or scratch soft metals. Learning the right approach protects the value and wearable beauty of every item in a collection.
How do you clean vintage jewelry without damaging it?
The safest way to clean vintage jewelry is to start with the gentlest method possible — warm water, mild dish soap like Dawn Platinum, and a soft-bristled baby toothbrush — then escalate only if grime persists. Harsh chemicals and ultrasonic cleaners can destroy old enamel, weaken glue settings, and etch porous stones like opal or turquoise. Here's the thing: age makes metal and settings far less forgiving than modern factory pieces.
That said, a basic toolkit goes a long way. Gather a few lint-free microfiber cloths, a soft cosmetics brush, a bowl of lukewarm distilled water, and a drop of pH-neutral soap. Avoid anything with ammonia, bleach, or abrasive scrubbing pads — they'll ruin a finish faster than you'd think.
Start by inspecting the piece under a bright lamp or a jeweler's loupe. Look for loose prongs, cracked stones, or worn clasps. If anything seems unstable, stop. (Cleaning a damaged piece in water can wash away tiny accent stones forever.) For stable items, mix one drop of soap into a cup of warm distilled water. Soak the jewelry for two to three minutes — never longer. Gently brush around settings and chain links with the baby toothbrush. Rinse under a slow stream of lukewarm water, then pat completely dry with a microfiber cloth. Let it air-dry on a clean cotton towel for another ten minutes before storing.
For gold pieces without stones, a commercial cleaner like Connoisseurs Precious Jewelry Cleaner works well — but only on solid, post-1960s gold. The catch? Victorian rolled gold and gold-filled items should never touch dip cleaners; the acid can eat through the thin gold layer and expose the base metal underneath. If you're unsure of a piece's metal content, stick to soap and water.
Can you restore tarnished silver jewelry at home?
Yes, tarnished silver jewelry can usually be restored at home using a soft polishing cloth, a mild silver polish like Hagerty Silversmiths' Spray, or a gentle baking-soda paste for heavier tarnish — provided the piece doesn't have intentional oxidation (blackened details) or fragile stones. The goal is to remove the dark sulfide layer without scrubbing away metal.
Worth noting: not all tarnish is bad. On Art Nouveau pieces or Victorian mourning jewelry, darkened crevices (called patina) actually add contrast and value. Stripping it away with aggressive polishing can reduce a piece's worth by half — or more. When in doubt, leave the darkness alone.
For light tarnish on plain sterling chains or brooches, a Sunshine Polishing Cloth — recommended by the Smithsonian Institution for gentle metal care — is often enough. These cloths are impregnated with micro-abrasives and leave a protective film behind. Rub lightly, change direction frequently, and stop as soon as the silver brightens. Over-polishing thins the metal over time.
For heavier tarnish, make a paste from three parts baking soda to one part water. Apply with a soft cloth or your fingertips — never a brush with stiff bristles. Work in small circles, rinse thoroughly, and dry immediately. The table below compares common at-home silver cleaning methods.
| Method | Best For | Avoid On | Result |
|---|---|---|---|
| Sunshine Polishing Cloth | Light tarnish, smooth surfaces | Intentional patina, oxidized details | Quick shine, minimal abrasion |
| Baking Soda Paste | Heavy tarnish on solid silver | Plated pieces, soft stones, pearls | Removes dark layers; requires rinsing |
| Hagerty Silversmiths' Spray | Flatware, large brooches, chains | Porous gems, wood, enamel | Fast, even coverage |
| Aluminum Foil + Baking Soda Bath | Heavily tarnished sterling | Pieces with glued stones, mixed metals | Chemical reaction reverses tarnish |
That said, the aluminum-foil method — where you line a glass dish with foil, add baking soda and hot water, then submerge the silver — is effective but risky for vintage items. The rapid chemical reaction can loosen old glues and damage composite materials. Stick to manual methods unless the piece is solid, stone-free, and structurally sound.
What's the best way to store antique rings and necklaces?
The best way to store antique rings and necklaces is in a cool, dark, dry environment — individually wrapped in acid-free tissue or soft anti-tarnish cloth and separated into compartmentalized boxes to prevent scratching and tangling. Humidity is silver's worst enemy; even a few weeks in a damp bathroom drawer can leave a thick black coating that's tedious to remove.
Invest in quality storage. The Gemological Institute of America advises keeping jewelry away from direct sunlight and extreme temperatures, which can fade certain gemstones and dry out organic materials like pearls, ivory, and jet. A lined jewelry box from a brand like Glenroyal or Stackers works well, but the real star is the lining material. Look for boxes lined with Pacific Silvercloth or those that include 3M Anti-Tarnish Strips — the strips absorb sulfur compounds from the air and last about six months before needing replacement.
For necklaces, hang them on padded velvet hooks or lay them flat in shallow trays. Chains tangle easily (especially fine Victorian snake chains), and a knot pulled too hard can kink or break links. Rings belong in individual slots or ring rolls — not tossed together in a heap where diamond accents can scratch gold bands or softer stones like amber can chip.
Pearls and opals need special treatment. These are organic or heavily hydrated stones; sealing them in plastic bags or airtight containers can suffocate them and cause cracking. Store pearl strands flat in a soft pouch, and let them breathe. Here's the thing: pearls actually benefit from occasional wear because skin oils keep them lustrous — just wipe them down with a soft cloth afterward and don't store them next to harder gemstones.
If you live in a humid climate — Edmonton summers can get surprisingly sticky — toss a few silica gel packets into the drawer. (Not the loose kind; tape them to the lid so they don't touch the jewelry directly.) Check on stored pieces every few months. A quick visual inspection catches tarnish early, before it etches deeply into the metal.
When should you take vintage jewelry to a professional?
You should take vintage jewelry to a professional whenever you spot loose stones, bent prongs, cracked enamel, broken clasps, or signs of previous poor repair — basically, any time the piece's structural integrity is in question. A trained jeweler or conservator has the magnification, soldering equipment, and materials knowledge to fix problems without causing further damage.
Ultrasonic cleaners and steam machines — staples of modern jewelry shops — are often too aggressive for vintage work. A reputable specialist (look for someone certified by the American Society of Appraisers or the Gemological Institute of America) will assess whether a piece can safely handle mechanical cleaning or if it needs hand-work only. The catch? Not all jewelers specialize in vintage. A mall store geared toward selling new engagement rings might lack experience with Georgian foil-backed stones or Victorian pinchbeck.
Seek out a conservator or a shop with an actual estate jewelry department — stores like Cynthia Findlay Antiques in Toronto or local Edmonton specialists such as Jewels by Eccellente — for high-value or historically significant items. It's better to pay for an expert opinion than to accidentally ruin a one-of-a-kind find.
Caring for vintage jewelry doesn't demand a vault of expensive tools — just patience, the right supplies, and a willingness to stop before doing harm. Every piece survived decades (sometimes centuries) to land in a collection today. Treat it gently, store it smartly, and it'll keep turning heads for generations to come.
Steps
- 1
Inspect Your Piece and Identify Materials
- 2
Clean Gently With the Right Solution and Tools
- 3
Dry Thoroughly and Store in a Controlled Environment